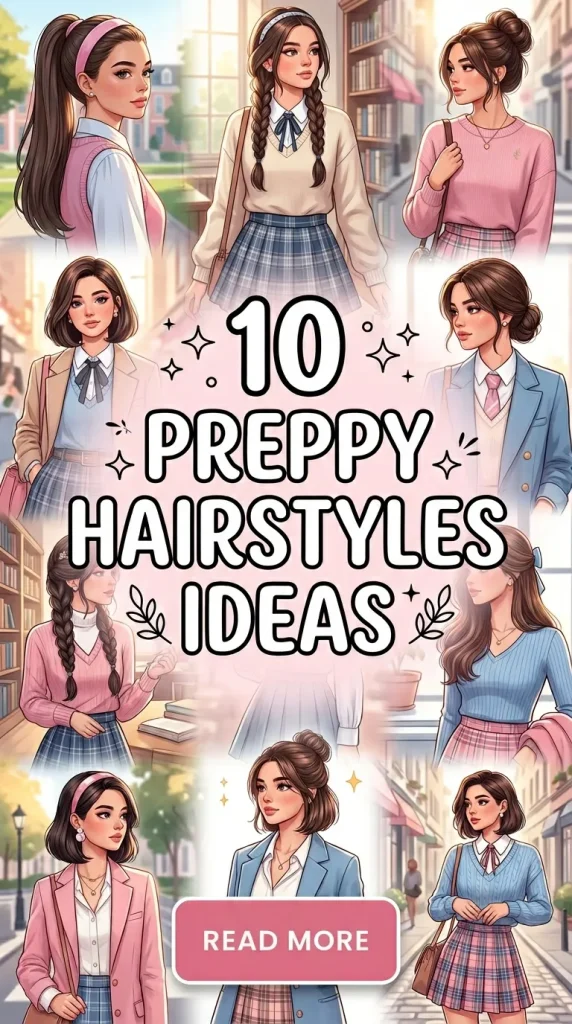
10 Preppy Hairstyles Ideas
Preppy hairstyles are the perfect blend of polished, classic, and effortlessly put-together. Inspired by timeless fashion staples like pleated skirts, tailored blazers, loafers, crisp button-down shirts, and structured accessories, the preppy aesthetic is all about neatness, confidence, and understated elegance. When it comes to hair, that means clean lines, smooth textures, soft volume, and styles that look intentional without appearing overdone.
The beauty of preppy hairstyles is that they’re versatile enough for school, college, work, brunch dates, tennis practice, study sessions, and even semi-formal events. They give off a refined, “I have my life together” energy while still feeling youthful and approachable. And the best part? Most preppy hairstyles are surprisingly simple to recreate at home with minimal tools.
On Pinterest, preppy hair is trending alongside “old money aesthetic,” “clean girl look,” and “classic feminine style.” These hairstyles focus on structure and shine rather than extreme volume or heavy texture. Think sleek ponytails, polished headbands, glossy straight hair, soft curls, and neatly tied bows. It’s less about messy, undone looks and more about clean silhouettes and balanced proportions.
Preppy hairstyles also emphasize healthy-looking hair. Shine, smoothness, and subtle volume at the crown make a huge difference. A middle or deep side part often defines the shape, while accessories like pearl clips, satin ribbons, and structured headbands complete the look. The key is refinement — not complication.
Another reason preppy hairstyles are so popular is that they photograph beautifully. The neatness of these styles translates well in pictures, making them ideal for social media, school photos, events, and daily content creation. Whether your hair is long, medium, or short, straight or slightly wavy, there’s a preppy style that will suit you.
In this guide, you’ll find 10 preppy hairstyle ideas that are polished, beginner-friendly, and easy to recreate. Each idea includes a clear explanation, step-by-step instructions, and a list of materials to help you achieve the look confidently. Whether you prefer minimalist elegance or classic feminine charm, these hairstyles will elevate your everyday style.
Let’s explore these chic and timeless preppy hairstyles.
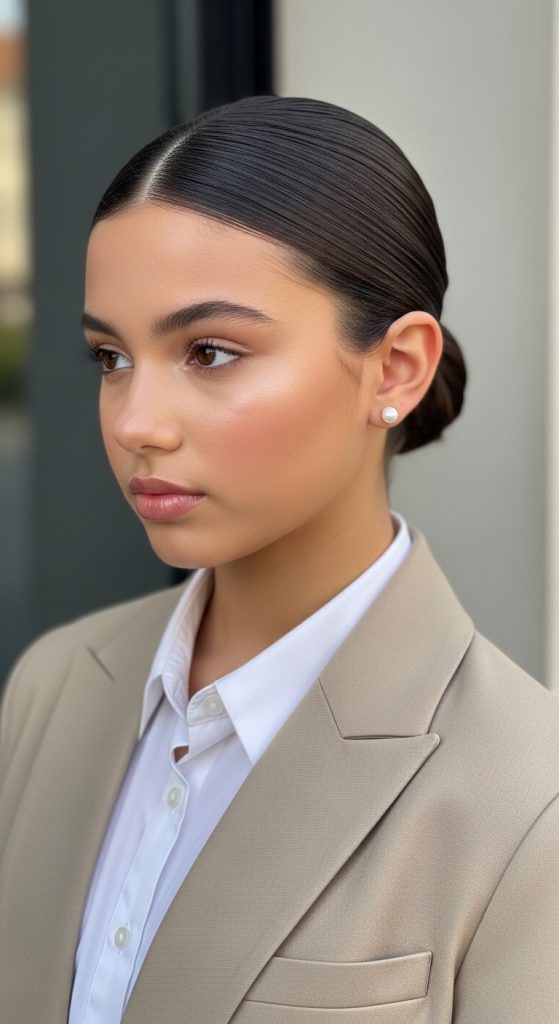
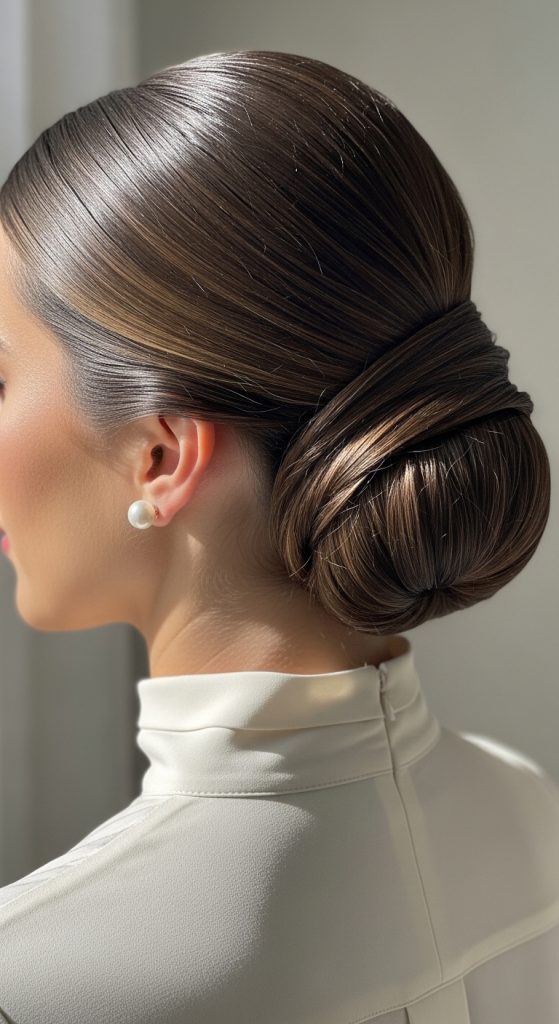
1. Sleek Low Ponytail
Introduction
The sleek low ponytail is the ultimate preppy staple. It’s clean, polished, and effortlessly elegant. This hairstyle pairs beautifully with collared shirts, blazers, cardigans, and structured dresses. It works for school, internships, business meetings, and formal lunches.
The beauty of this style lies in its simplicity. Smooth roots and a neat silhouette instantly create a refined look without requiring complex techniques.
Why It’s Preppy
The sleek finish gives a sophisticated, put-together appearance. It highlights facial features and works well with subtle makeup and minimal accessories.
Step-by-Step How-To
- Start with clean, dry hair.
- Create a middle or slight side part.
- Apply smoothing serum to reduce frizz.
- Brush hair back toward the nape.
- Secure into a low ponytail with an elastic.
- Wrap a small strand around the elastic and pin underneath.
- Finish with shine spray.
Materials Needed
- Fine-tooth comb
- Smoothing serum
- Hair elastic
- Bobby pin
- Shine spray
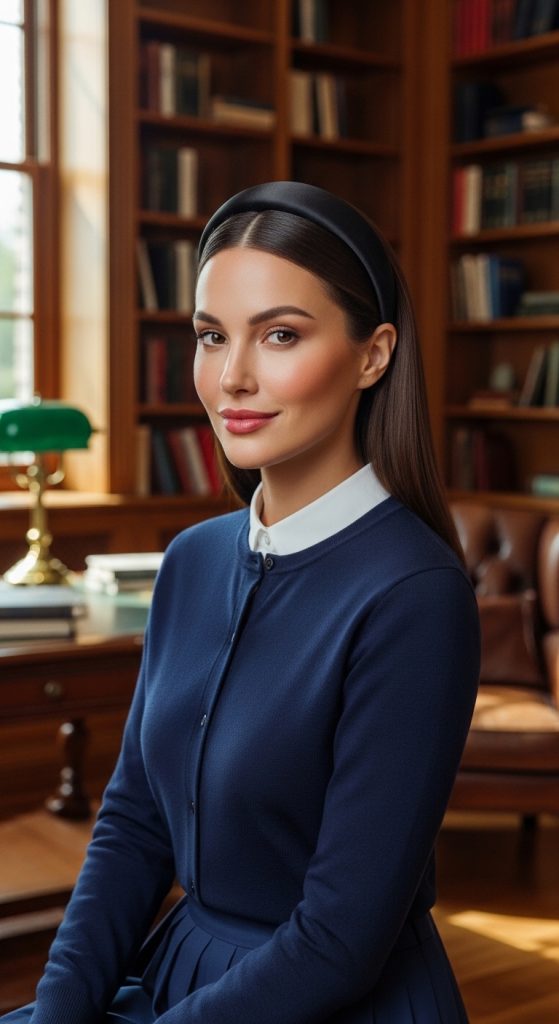
2. Classic Headband Look
Introduction
A structured headband instantly creates a preppy aesthetic. Whether it’s satin, velvet, or pearl-embellished, a headband adds polish to loose or straight hair.
This style is perfect for school days, brunch, or casual outings when you want to look neat with minimal effort.
Why It’s Timeless
Headbands have long been associated with classic collegiate style. They frame the face beautifully and elevate simple hairstyles.
Step-by-Step How-To
- Straighten or lightly smooth hair.
- Create a clean center or side part.
- Place the headband about an inch behind the hairline.
- Adjust for comfort.
- Lightly tease crown for subtle volume (optional).
- Finish with light hairspray.
Materials Needed
- Structured headband
- Flat iron (optional)
- Comb
- Hairspray
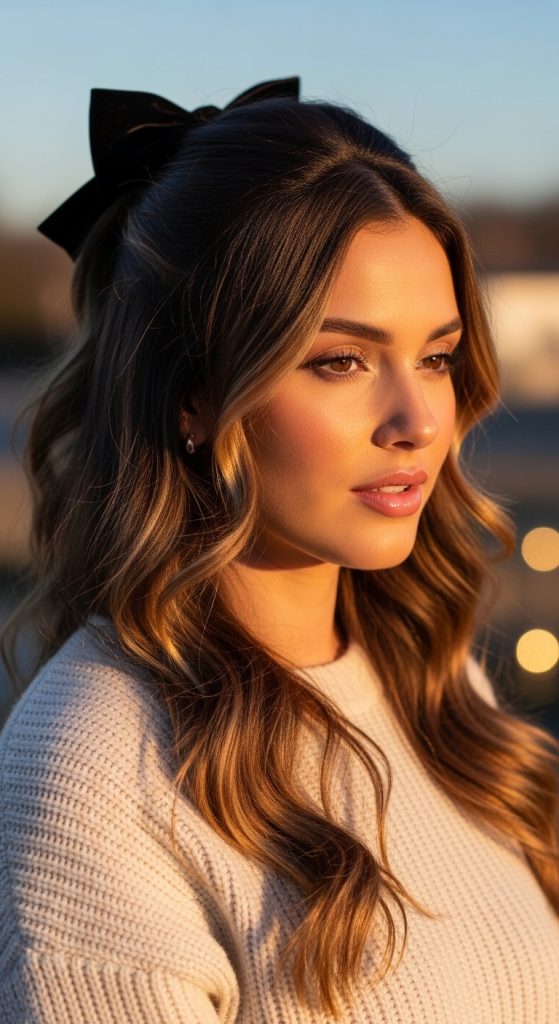
3. Half-Up with Bow
Introduction
The half-up hairstyle tied with a satin or velvet bow is playful yet polished. It’s feminine, soft, and perfectly aligned with the preppy aesthetic.
This style works beautifully for school events, study dates, and seasonal photos.
Why It’s Preppy Chic
The bow adds a structured yet delicate touch that feels classic and intentional.
Step-by-Step How-To
- Section off the top half of your hair.
- Smooth lightly with a brush.
- Secure with a small elastic.
- Tie a ribbon or attach a bow clip.
- Curl ends slightly for softness.
- Spray lightly for hold.
Materials Needed
- Small elastic
- Satin or velvet bow
- Curling iron (optional)
- Light hairspray
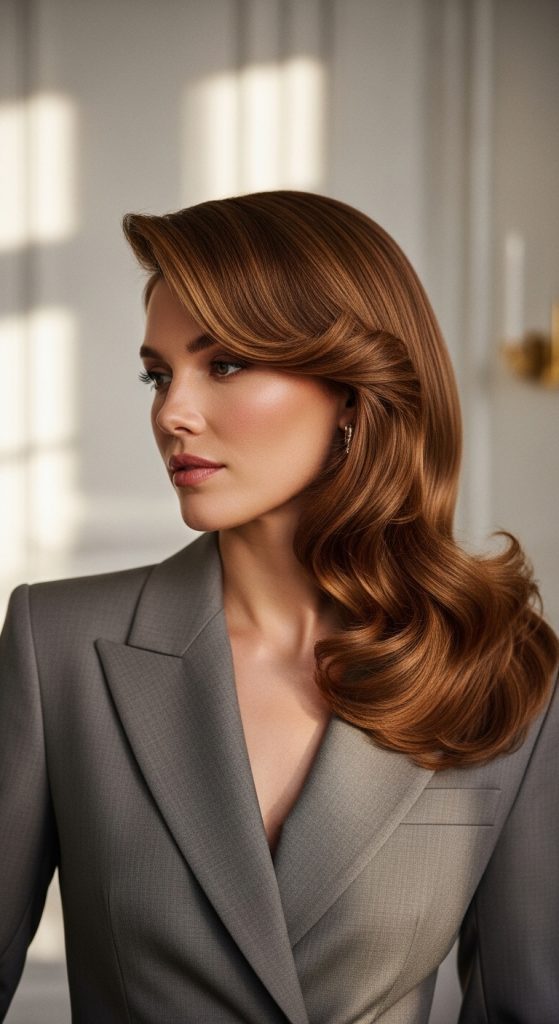
4. Soft Blowout Waves
Introduction
Soft blowout waves give volume and shine without looking messy. This hairstyle looks expensive and well-maintained — key elements of the preppy aesthetic.
It pairs perfectly with tailored outfits and neutral tones.
Why It’s Elegant
The smooth volume at the crown and soft curve at the ends create a balanced, refined look.
Step-by-Step How-To
- Apply heat protectant to damp hair.
- Blow dry using a round brush.
- Roll ends inward for shape.
- Add shine spray.
- Smooth flyaways.
Materials Needed
- Blow dryer
- Round brush
- Heat protectant
- Shine spray
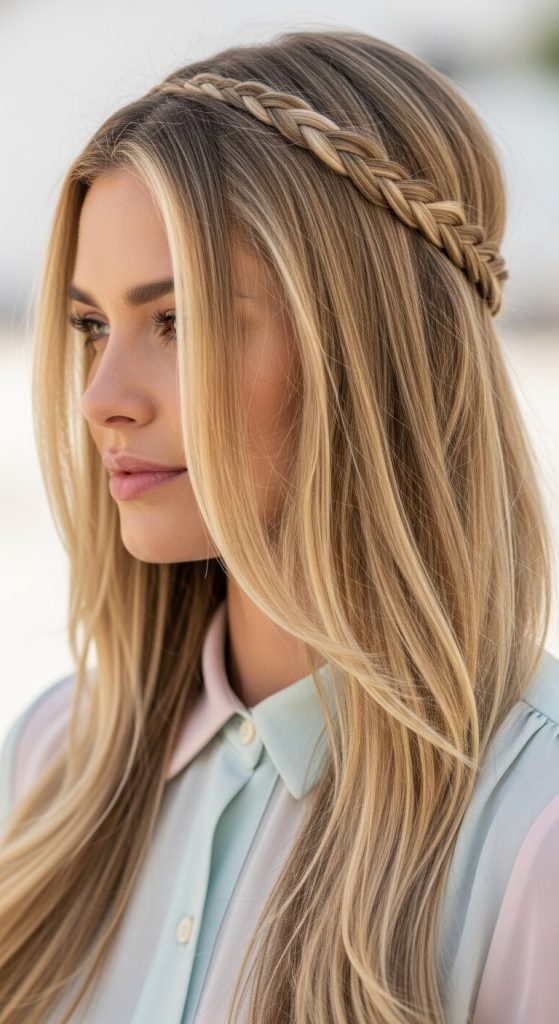
5. Braided Headband
Introduction
The braided headband uses your own hair to create a subtle crown effect. It’s sweet, structured, and polished.
Perfect for daytime outings or school.
Why It Works
It keeps hair off the face while maintaining softness.
Step-by-Step How-To
- Take a small section near the ear.
- Braid tightly.
- Pull braid across the top like a headband.
- Pin behind opposite ear.
- Spray lightly.
Materials Needed
- Bobby pins
- Elastic
- Comb
- Hairspray
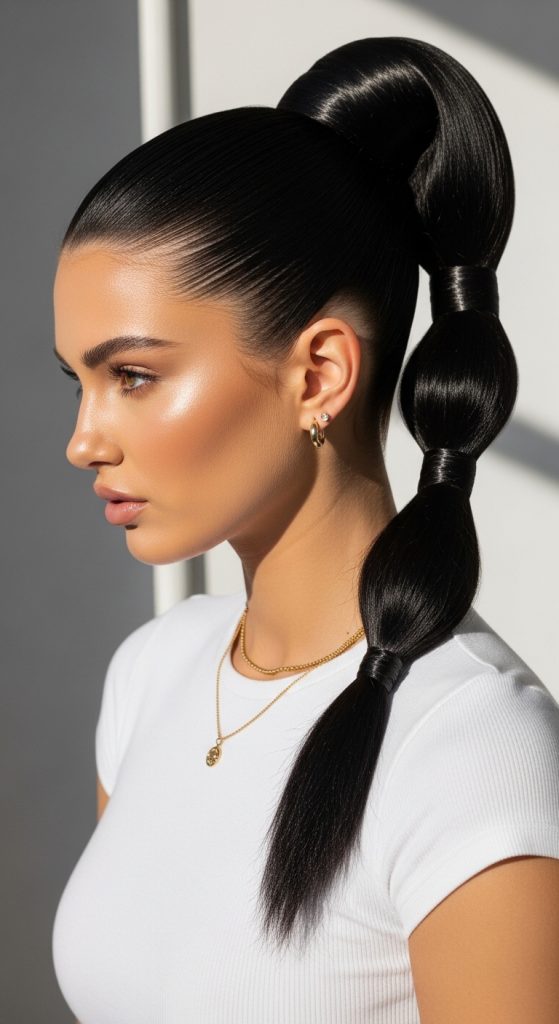
6. High Polished Ponytail
Introduction
A high ponytail can be preppy when sleek and controlled. It feels fresh and energetic.
Why It’s Classic
Clean lines and shine keep it structured.
Step-by-Step How-To
- Straighten hair.
- Brush upward to crown.
- Secure tightly.
- Wrap strand around base.
- Spray lightly.
Materials Needed
- Elastic
- Flat iron
- Shine serum
- Bobby pin
7. Low Twisted Bun
Introduction
The low twisted bun is elegant and timeless. It pairs beautifully with blazers and formal dresses.
Why It’s Refined
It keeps hair neatly secured while looking soft.
Step-by-Step How-To
- Create low ponytail.
- Divide into two sections.
- Twist both sections.
- Wrap into bun.
- Pin securely.
Materials Needed
- Elastic
- Bobby pins
- Hairspray
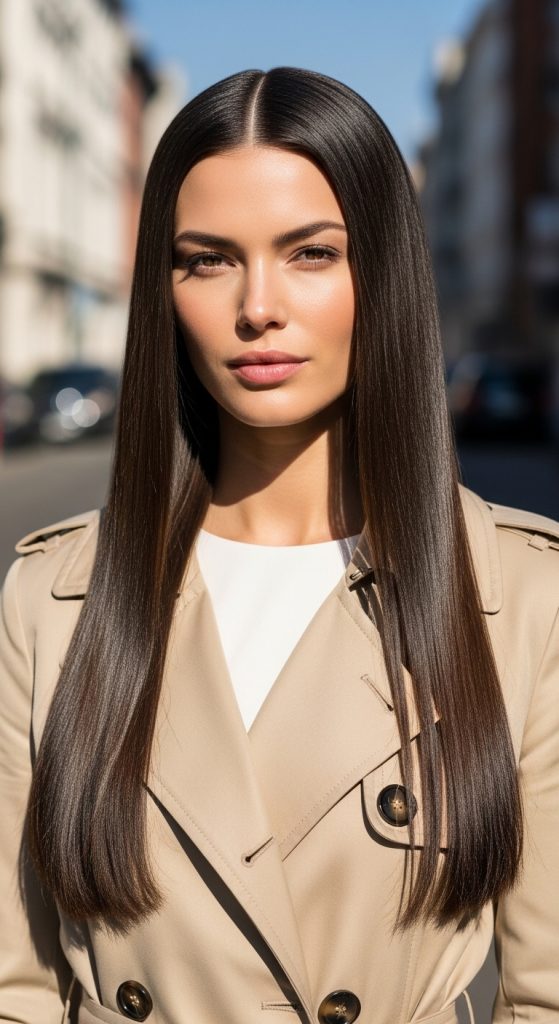
8. Straight and Glossy
Introduction
Super straight, glossy hair screams clean, preppy elegance.
Why It’s Minimalist
It emphasizes health and shine over volume.
Step-by-Step How-To
- Apply heat protectant.
- Blow dry smooth.
- Flat iron in sections.
- Add shine serum.
Materials Needed
- Blow dryer
- Flat iron
- Heat protectant
- Shine serum
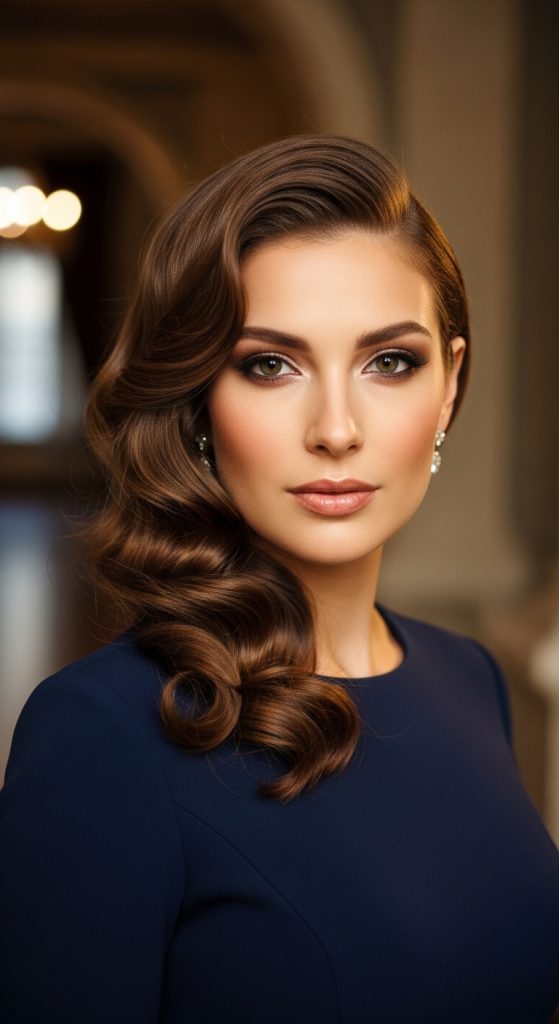
9. Side Part with Soft Curls
Introduction
A defined side part with subtle curls feels polished and feminine.
Why It’s Sophisticated
Adds movement without looking messy.
Step-by-Step How-To
- Create deep side part.
- Curl ends only.
- Brush gently.
- Spray lightly.
Materials Needed
- Curling iron
- Comb
- Hairspray
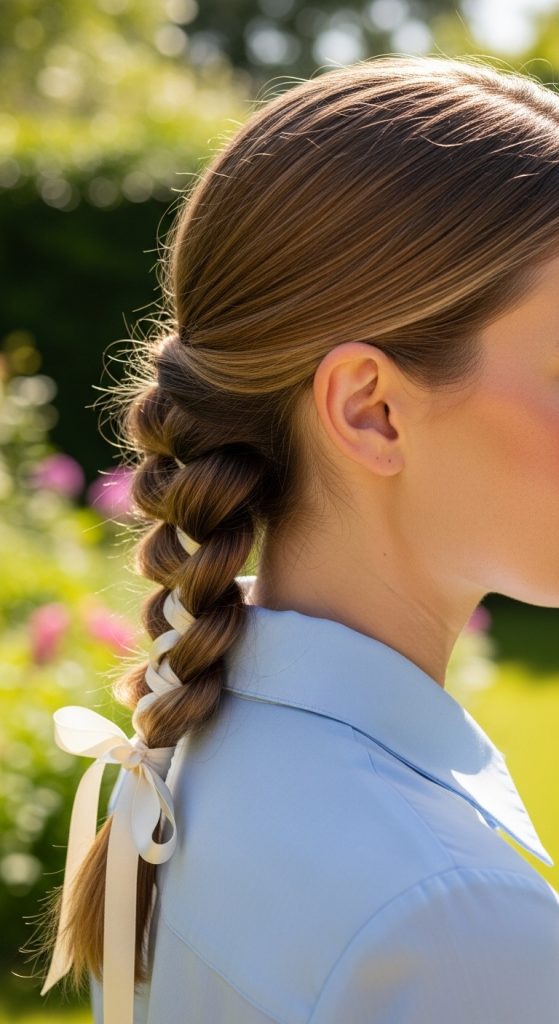
10. Ribbon-Tied Low Braid
Introduction
A simple low braid tied with a ribbon is classic and charming.
Why It’s Preppy
The ribbon detail adds structure and elegance.
Step-by-Step How-To
- Gather hair at nape.
- Create three-strand braid.
- Secure with elastic.
- Tie ribbon over elastic.
- Loosen slightly for softness.
Materials Needed
- Elastic
- Ribbon
- Comb
- Hairspray