An engagement is one of the most emotionally charged and visually documented moments in a person’s life. From the instant the ring slides onto the finger, hands become the center of attention—photographed, filmed, admired, and remembered forever. That’s why engagement nails are no longer just “pretty nails.” They are a deliberate style choice, a form of self-expression, and a subtle extension of the engagement story itself. Today’s engagement nails go far beyond classic pale pinks or French tips. Modern brides-to-be are embracing individuality, creativity, and personality through nail designs that feel meaningful, memorable, and uniquely theirs.

Pinterest trends show a clear shift toward intentional nail styling for engagements. People want nails that photograph beautifully next to a ring, complement their skin tone, and match their overall aesthetic—whether that’s minimalist elegance, bold glamour, soft romance, or modern edge. Engagement nails are now planned weeks in advance, often coordinated with outfits, proposal locations, and even future wedding themes. This makes them an essential part of engagement preparation rather than an afterthought.
Another major reason engagement nails matter is longevity. Engagement photos don’t disappear after one day. They live on social media, Pinterest boards, wedding websites, albums, and family frames. A thoughtful nail design ensures your hands look polished and timeless across all these contexts. At the same time, many people want something that still feels wearable for everyday life after the proposal—a balance between special and practical.
Uniqueness is the key word here. While classic styles will always have a place, many engaged couples want to avoid designs that feel overdone or generic. Unique engagement nails don’t necessarily mean loud or dramatic. They can be subtle, symbolic, textural, or personalized in a way that feels elevated and intentional. A single accent nail, a custom color blend, or a hidden detail can make a design feel truly special without overpowering the ring.
This article focuses on 10 unique engagement nail ideas that are Pinterest-worthy, beginner-friendly, and adaptable to different preferences. Each idea is carefully explained so you understand not just how it looks, but why it works so well for engagements. You’ll also find step-by-step guidance and material lists so you can recreate each style confidently—whether you’re visiting a nail salon or doing them yourself.
Whether you’re planning a surprise proposal manicure, refreshing your nails before a ring shopping appointment, or simply saving inspiration for later, these ideas are designed to help you choose nails that feel personal, elegant, and unforgettable. Let’s explore engagement nail designs that go beyond trends and help you mark this once-in-a-lifetime moment with intention and style.
1. Milky Base with Hidden Micro-Heart Accent
This engagement nail idea is perfect for those who love clean, modern elegance with a romantic twist. At first glance, the nails appear soft and minimal, using a milky white or sheer nude base that enhances the natural look of the hands. The uniqueness comes from a tiny micro-heart accent placed discreetly near the cuticle or along the side of one nail. This subtle detail makes the design intimate and symbolic without being obvious.
The beauty of this style lies in its versatility. It photographs beautifully with any ring style, complements all skin tones, and transitions seamlessly into everyday wear after the engagement. The hidden heart feels like a secret detail—something meaningful that doesn’t overpower the overall look.
How to Create This Look
- Start by shaping nails into a soft almond or rounded square for a timeless silhouette.
- Apply a sheer milky base color in thin layers to achieve a smooth, semi-transparent finish.
- Choose one accent nail (usually the ring finger).
- Using a fine nail art brush or dotting tool, create a tiny heart using soft white, blush, or champagne polish.
- Seal with a glossy top coat for a polished finish.
Materials Used
- Milky white or sheer nude gel polish
- Fine nail art brush or dotting tool
- Top coat (high-gloss recommended)
- Nail file and buffer

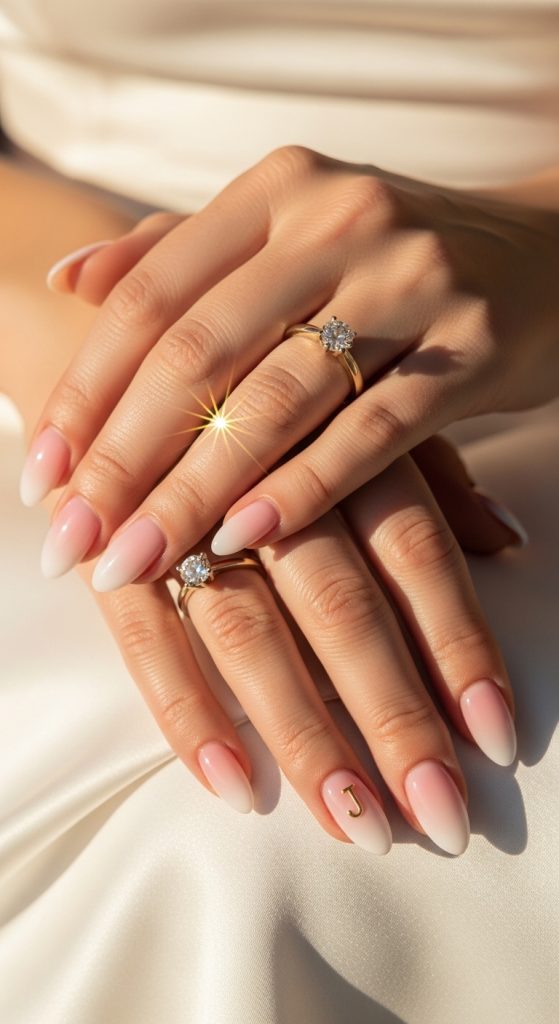
2. Soft Ombre Engagement Nails with Personalized Initial
Soft ombre nails have long been a bridal favorite, but adding a personalized initial takes this engagement design to a new level. The ombre effect usually blends a sheer pink into a soft white, creating a delicate gradient that feels romantic and timeless. The uniqueness comes from placing a tiny initial—either your own, your partner’s, or both—on one discreet nail.
This design balances elegance with personalization, making it ideal for those who want their engagement nails to tell a story. The initial detail is subtle enough to remain classy but meaningful enough to feel special.
How to Create This Look
- Prep and shape nails into almond or oval shapes.
- Apply a sheer pink base coat.
- Blend white polish from the tip downward using a sponge or ombre brush.
- Once cured, add a tiny initial using a fine brush or nail sticker.
- Finish with a protective glossy top coat.
Materials Used
- Sheer pink gel polish
- White gel polish
- Ombre sponge or blending brush
- Fine liner brush or nail decals
- Glossy top coat
3. Champagne Chrome Engagement Nails
For those who love subtle luxury, champagne chrome nails offer a refined yet modern engagement look. Unlike silver chrome, champagne chrome has a warm undertone that enhances skin tone and complements gold or rose-gold rings beautifully. The uniqueness lies in its understated glow—it reflects light softly rather than dramatically.
This style feels elevated without being flashy, making it perfect for engagement photos where the ring should still be the star.
How to Create This Look
- Apply a neutral nude base and cure fully.
- Rub champagne chrome powder onto the nail using an applicator.
- Buff gently for an even metallic sheen.
- Seal with a no-wipe top coat to preserve shine.
Materials Used
- Nude gel polish
- Champagne chrome powder
- Silicone applicator
- No-wipe top coat

4. Minimalist Pearl-Dotted Engagement Nails
Pearls are a timeless symbol of love and elegance, making them a beautiful choice for engagement nails. This design uses a soft nude or blush base with tiny pearl accents placed delicately near the cuticle or along one edge of the nail. The look is refined, romantic, and effortlessly chic.
The uniqueness comes from restraint—using just one or two pearls per nail instead of overloading the design.
How to Create This Look
- Apply a neutral base color and cure.
- Place small pearls using nail glue or builder gel.
- Secure gently without covering pearls completely.
- Finish with a glossy top coat around the pearls.
Materials Used
- Nude or blush gel polish
- Mini pearl nail embellishments
- Nail glue or builder gel
- Top coat

5. Sheer Pink Nails with Gold Foil Veins
This design combines softness with artistry. A sheer pink base keeps the look delicate, while thin gold foil veins add a unique, organic element. The foil resembles fine jewelry details, subtly tying the nails to the engagement ring.
How to Create This Look
- Apply sheer pink polish as the base.
- Tear small pieces of gold foil.
- Place foil in thin, vein-like patterns.
- Seal with a smooth top coat.
Materials Used
- Sheer pink gel polish
- Gold nail foil
- Tweezers
- Glossy top coat

6. Matte Nude with Glossy Ring Finger Accent
This engagement nail idea plays with texture rather than color. A soft matte nude base feels modern and understated, while a glossy ring finger creates contrast and draws attention to the engagement ring. The uniqueness comes from this quiet contrast—it’s noticeable without being loud.
How to Create This Look
- Apply nude polish to all nails.
- Use matte top coat on all except the ring finger.
- Apply glossy top coat only on the accent nail.
Materials Used
- Nude gel polish
- Matte top coat
- Glossy top coat

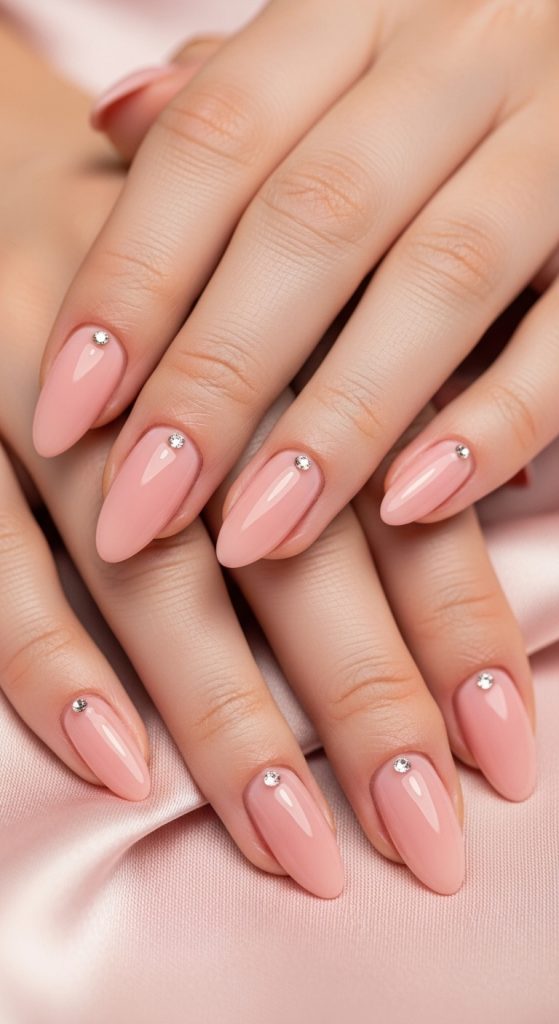
7. Blush Nails with Tiny Diamond-Inspired Crystals
Inspired by the sparkle of an engagement ring, this design features tiny crystal accents placed strategically on a blush base. The crystals mimic diamond reflections without overwhelming the nails.
How to Create This Look
- Apply blush base color.
- Place one small crystal near the cuticle on select nails.
- Secure with builder gel and seal.
Materials Used
- Blush gel polish
- Micro crystal embellishments
- Builder gel
- Top coat
8. Neutral Nails with Subtle Floral Line Art
This idea is ideal for romantic souls. A neutral base paired with fine floral line art creates a soft, artistic look. The design is unique because it feels hand-drawn and personal.
How to Create This Look
- Apply neutral base color.
- Use a fine liner brush to draw minimal florals.
- Seal with a glossy finish.
Materials Used
- Neutral gel polish
- Fine liner brush
- White or soft brown polish
- Top coat

9. Soft Beige Nails with Ring Frame Accent
This design frames the engagement ring visually. One nail features a subtle outline or arc that mimics a ring setting, drawing attention naturally to the jewelry.
How to Create This Look
- Apply beige base color.
- Draw a curved metallic or white outline near the cuticle.
- Seal for durability.
Materials Used
- Beige gel polish
- Metallic or white liner polish
- Fine brush
- Top coat

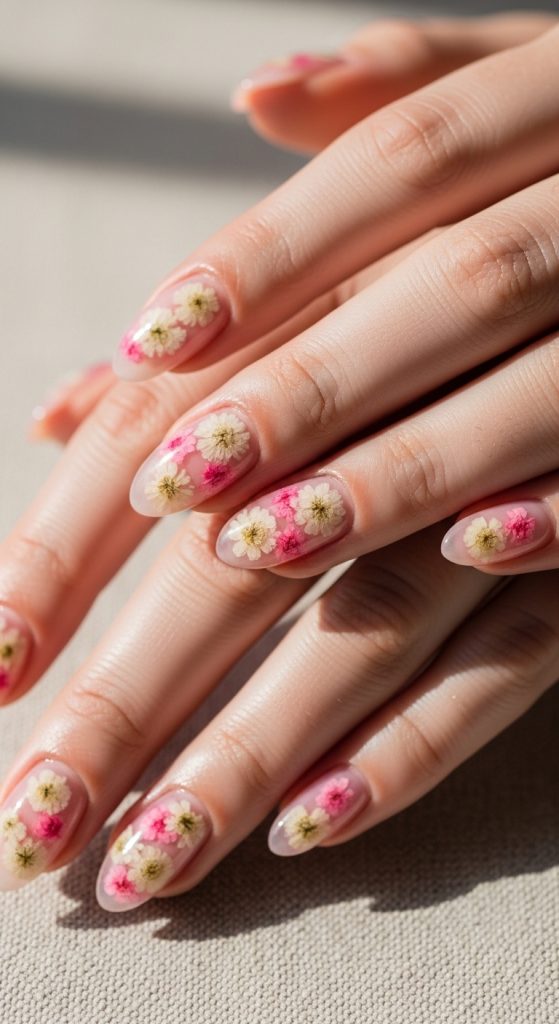
10. Translucent Nails with Embedded Dried Flowers
This engagement nail idea feels romantic and ethereal. Tiny dried flowers are embedded into a translucent base, creating a soft, natural look that feels timeless and meaningful.
How to Create This Look
- Apply clear or translucent pink base.
- Place dried flowers carefully using tweezers.
- Encapsulate with builder gel.
- Finish with a glossy top coat.
Materials Used
- Clear or translucent gel polish
- Dried mini flowers
- Builder gel
- Glossy top coat