Fancy nail designs are no longer reserved only for special occasions or salon visits. Today, nail art has become a powerful form of self-expression, a fashion accessory, and a confidence boost all in one. From delicate rhinestone accents to bold metallic finishes, fancy nails allow you to wear art on your fingertips. The beauty of modern nail design is that it blends creativity with accessibility — even beginners can recreate high-end looks with the right tools and guidance.

Fancy nails are trending heavily on Pinterest because they photograph beautifully and elevate any outfit instantly. A simple black dress becomes red-carpet ready with crystal nails. Casual jeans look styled and intentional with chrome tips. Fancy designs don’t always mean complicated; they mean thoughtful detail, layered textures, and eye-catching finishes. The key is combining polish, embellishments, and shape in a way that feels cohesive and luxurious.
Another reason these designs are so popular is versatility. Fancy nails can be soft and bridal, bold and editorial, glamorous and party-ready, or minimal and elegant. You can tailor them to your personality and lifestyle. Whether you prefer short natural nails with subtle sparkle or long sculpted sets with dramatic shine, there is a fancy design that matches your comfort level. Many of these looks can also be adapted for press-ons or DIY gel kits, making salon-quality nails achievable at home.
This guide focuses on 10 fancy nail design ideas that are Pinterest-worthy, beginner-friendly, and practical. Each idea explains the concept, provides clear steps, and lists the materials needed so you can recreate the look confidently. These designs are structured to be save-worthy inspiration boards you can return to when planning your next manicure. If you want nails that feel polished, stylish, and unforgettable, these fancy designs will deliver that elevated aesthetic.
1. Crystal Accent French Tips
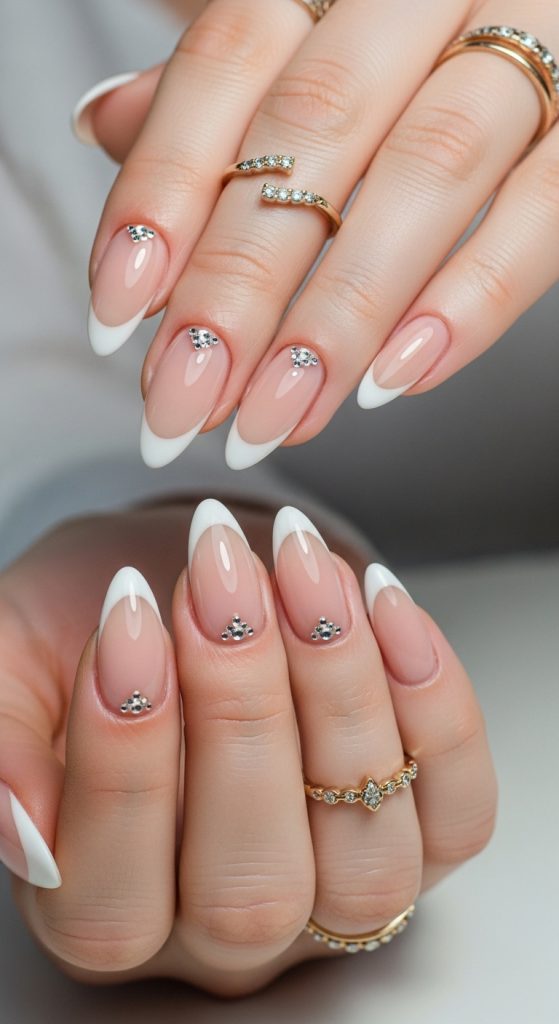
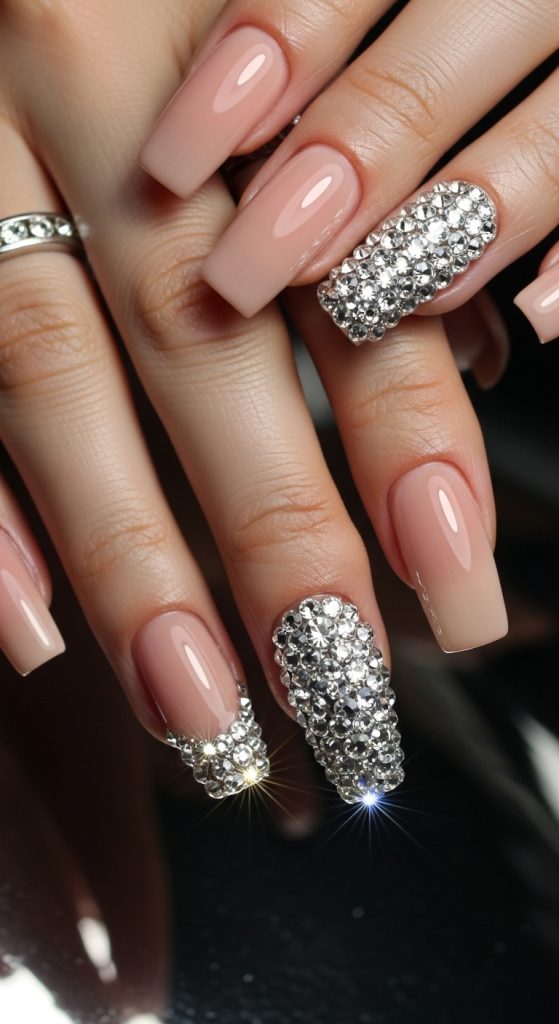
Crystal accent French tips upgrade the classic manicure into a glamorous statement. Instead of a plain white tip, this design features a traditional French base enhanced with carefully placed rhinestones near the cuticle or along the smile line. The contrast between clean nude polish and sparkling crystals creates a luxury look that feels bridal, red-carpet ready, and timeless.
This design is perfect for weddings, formal events, or everyday elegance if you prefer refined sparkle. It balances simplicity and glamour, making it ideal for beginners entering fancy nail art.
How to create this look
Start with clean, shaped nails and apply a base coat. Apply a nude or sheer pink polish as the base and cure or dry fully. Paint thin white French tips using a fine brush or French guide. Once dry, apply a small dot of nail glue or gel where you want crystals placed. Use tweezers to position rhinestones carefully. Cure if using gel. Seal lightly with top coat around the stones, not over them.
Materials needed
- Base coat
- Nude base polish
- White tip polish
- Small rhinestones
- Nail glue or builder gel
- Tweezers
- Top coat
2. Gold Foil Marble Nails
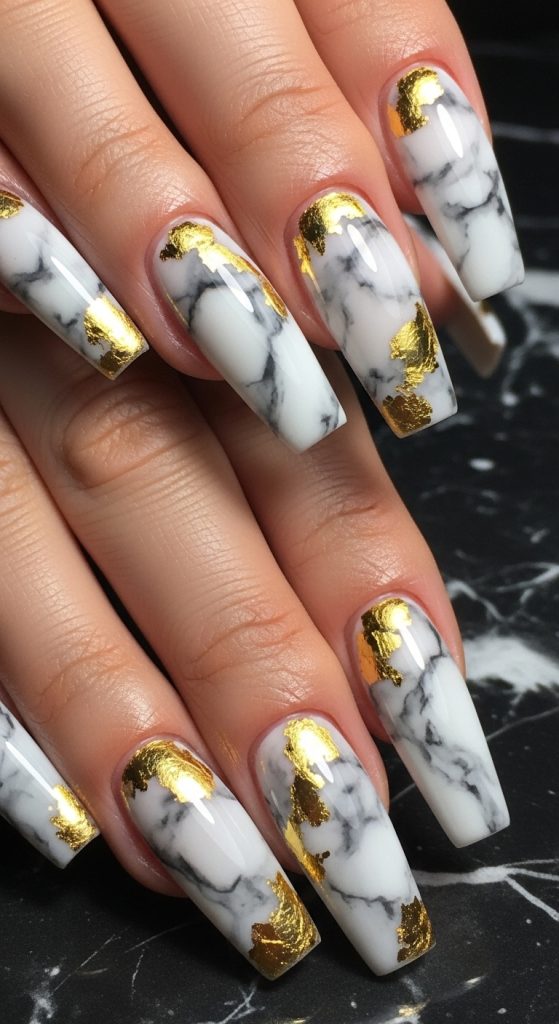
Gold foil marble nails mimic luxury stone textures with metallic accents. This design blends white, gray, and soft nude tones with gold foil flakes to create an artistic, high-fashion finish. Each nail looks unique, like wearable sculpture.
The marble effect adds depth while gold foil introduces richness. It’s a favorite Pinterest style because it feels expensive and modern.
How to create this look
Apply base coat and a white base color. While the polish is slightly wet, add thin gray lines using a detail brush and blur them gently with acetone or alcohol. Press small pieces of gold foil randomly onto the nail. Seal with a glossy top coat.
Materials needed
- Base coat
- White polish
- Gray detail polish
- Gold foil flakes
- Detail brush
- Top coat
3. Chrome Mirror Fancy Nails
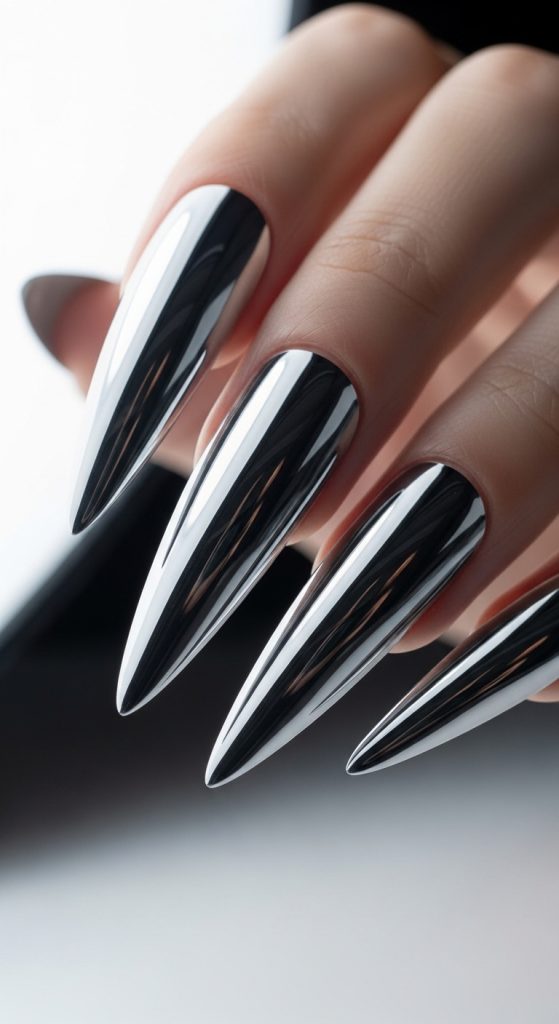
Chrome mirror nails are bold, futuristic, and ultra-glamorous. The reflective finish creates a liquid metal effect that captures attention instantly. Silver and rose gold chrome are the most popular fancy choices.
This design is perfect for parties or statement fashion looks.
How to create this look
Apply base coat and black gel polish. Cure fully. Rub chrome powder onto the nail using an applicator until smooth and reflective. Seal with a no-wipe top coat and cure.
Materials needed
- Base coat
- Black gel polish
- Chrome powder
- Applicator sponge
- UV/LED lamp
- Top coat
4. Velvet Matte Jewel Nails
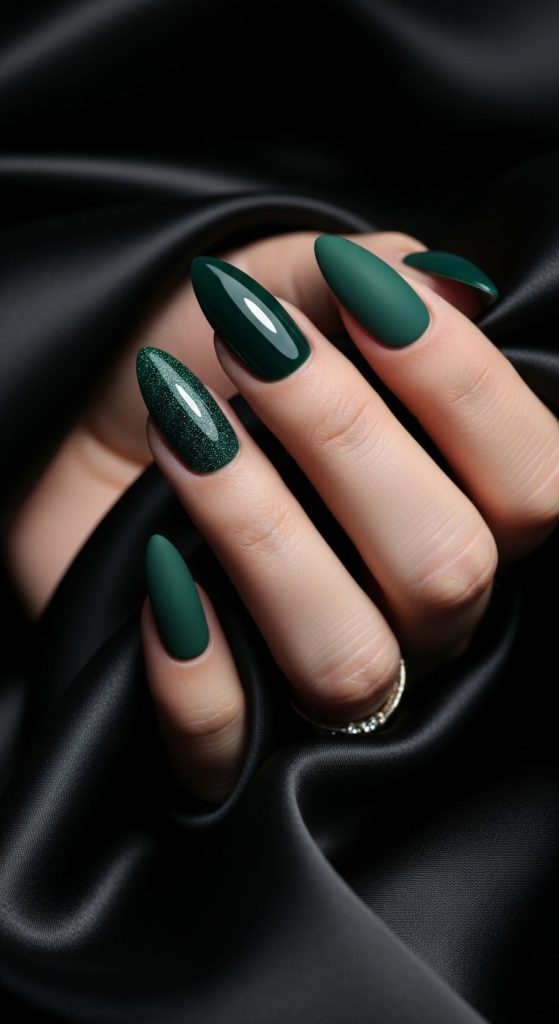
Velvet matte nails combine deep jewel tones with a soft matte finish. Emerald, sapphire, and burgundy shades look rich and luxurious. The matte texture contrasts beautifully with glossy accent nails or crystals.
This design feels modern and editorial.
How to create this look
Apply base coat and jewel-toned polish. Cure or dry. Add a matte top coat. Optional: leave one nail glossy or add crystals.
Materials needed
- Base coat
- Jewel-toned polish
- Matte top coat
- Optional crystals
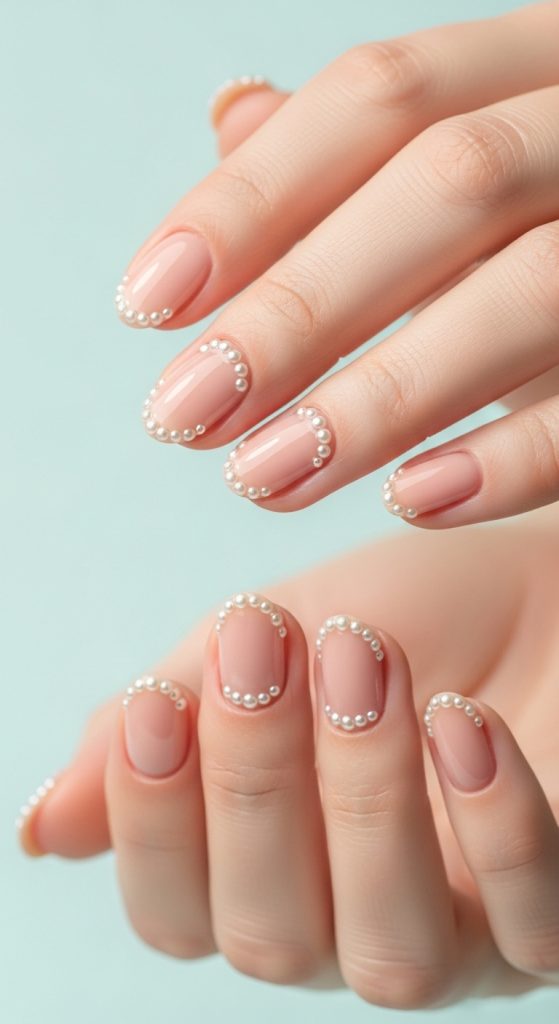
5. Pearl Embellished Nails
Pearl nails add soft elegance and bridal charm. Tiny pearls arranged near the cuticle or scattered lightly across the nail create a couture look.
This style feels delicate yet fancy.
How to create this look
Apply nude polish base. Add small dots of glue and place pearls carefully. Seal edges with top coat.
Materials needed
- Base coat
- Nude polish
- Mini pearls
- Nail glue
- Top coat
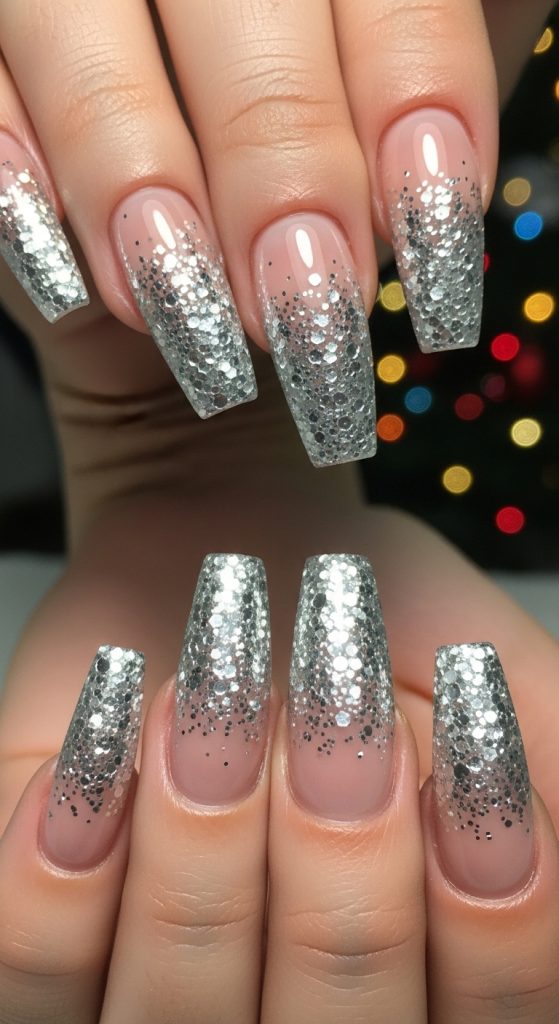
6. Glitter Fade Ombre Nails
Glitter ombre nails blend sparkle into a smooth gradient. The glitter fades from the tip toward the base, creating a glamorous transition.
Perfect for festive events.
How to create this look
Apply base color. Dab glitter polish onto tips using a sponge, fading downward. Seal with glossy top coat.
Materials needed
- Base coat
- Neutral polish
- Glitter polish
- Makeup sponge
- Top coat
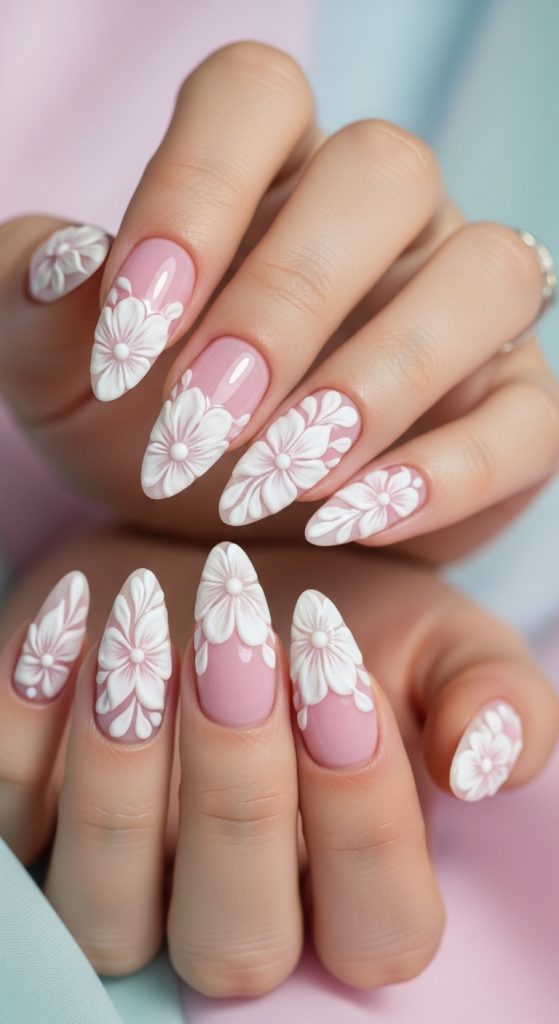
7. 3D Floral Fancy Nails
3D floral nails feature sculpted flowers that add texture and artistry. They look couture and handmade.
Ideal for weddings or photoshoots.
How to create this look
Apply base color. Sculpt flowers using acrylic or gel. Cure and seal carefully around design.
Materials needed
- Base coat
- Base polish
- 3D gel or acrylic
- Sculpting brush
- Top coat
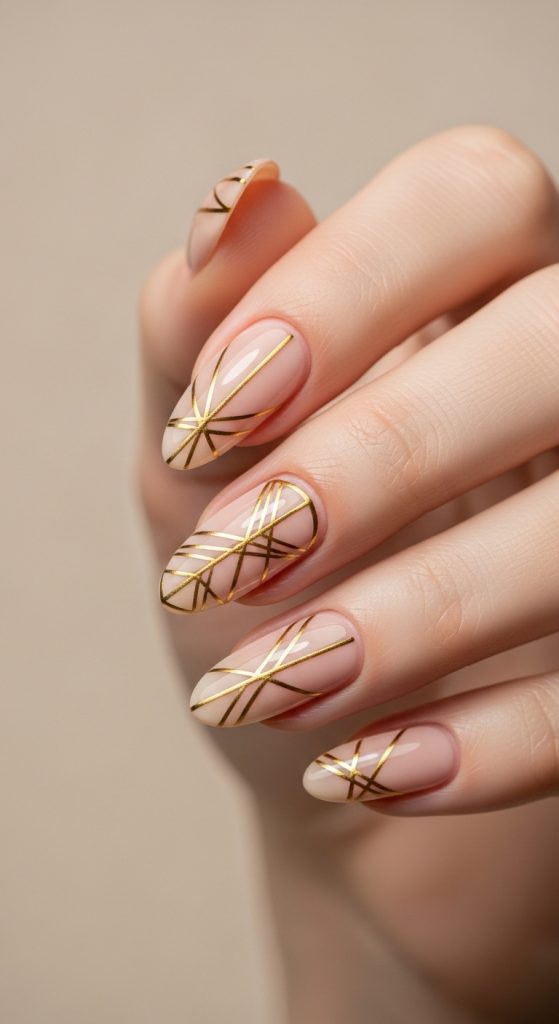
8. Metallic Line Art Nails
Thin metallic lines over nude polish create a sleek geometric design. Gold striping tape adds a clean, modern edge.
This look is minimal but fancy.
How to create this look
Apply nude base. Place metallic striping tape in geometric patterns. Seal with top coat.
Materials needed
- Base coat
- Nude polish
- Metallic striping tape
- Top coat
9. Rhinestone Glam Nails
Full rhinestone accent nails deliver maximum sparkle. One or two nails become crystal statement pieces.
Perfect for bold glam lovers.
How to create this look
Apply base polish. Cover accent nail with glue and place rhinestones tightly together. Seal edges.
Materials needed
- Base coat
- Polish color
- Rhinestones
- Nail glue
- Tweezers
- Top coat
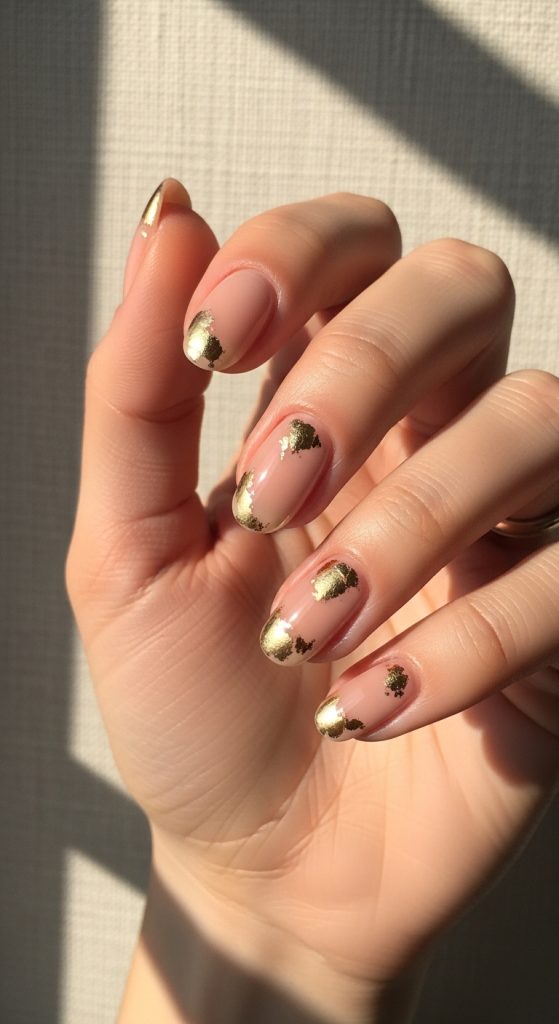
10. Luxury Nude Gold Accent Nails
Nude nails with thin gold accents feel elegant and expensive. The simplicity makes the gold pop.
This design suits everyday luxury.
How to create this look
Apply nude polish. Paint thin gold lines or add foil accents. Seal glossy.
Materials needed
- Base coat
- Nude polish
- Gold liner polish or foil
- Top coat