10 Hair Braids for Kids – Easy
When it comes to kids’ hairstyles, parents want something simple, quick, protective, and absolutely adorable. Easy braids for kids are the perfect solution because they keep hair neat, reduce tangling, and last for several days with proper care. Whether your child is heading to school, a birthday party, family photos, or just playing outside, braided hairstyles help keep everything in place while still looking stylish.
One of the biggest advantages of braid styles for kids is versatility. You can create simple two-braid styles for busy mornings, add beads for a playful touch, or experiment with creative parting designs for special occasions. Braids also help protect natural hair from breakage, especially for children with textured or curly hair. Since kids are active, protective styles reduce daily combing and minimize discomfort.
Another reason easy braid hairstyles are trending on Pinterest is because they balance beauty and practicality. Parents are searching for hairstyles that don’t require complicated techniques or long salon hours. The goal is clean parts, gentle tension, and styles that last at least a week with light maintenance.
In this guide, you’ll find 10 easy braid ideas for kids that are beginner-friendly, cute, and functional. Each style includes a clear explanation, step-by-step instructions, and a materials list so you can recreate it at home confidently. These braid ideas are perfect for toddlers, elementary-aged kids, and even pre-teens.
Let’s explore these adorable and easy braid hairstyles for kids.
1. Classic Two Straight-Back Braids
This is one of the easiest and most timeless braid styles for kids. Two straight-back braids are simple, comfortable, and perfect for school days. The hair is parted down the middle and braided straight back into two neat cornrows.
Why It’s Great for Kids
This style keeps hair secure, is quick to install, and works for almost any hair type. It also reduces daily styling stress.
How to Do It
- Start with detangled, moisturized hair.
- Create a straight center part from forehead to nape.
- Clip one side away.
- Apply a small amount of gel to one section.
- Cornrow straight back to the nape.
- Repeat on the other side.
- Secure ends with elastics or beads.
Materials Needed
- Rat-tail comb
- Detangling brush
- Moisturizer or leave-in conditioner
- Light styling gel
- Hair elastics
Simple, clean, and perfect for busy mornings.
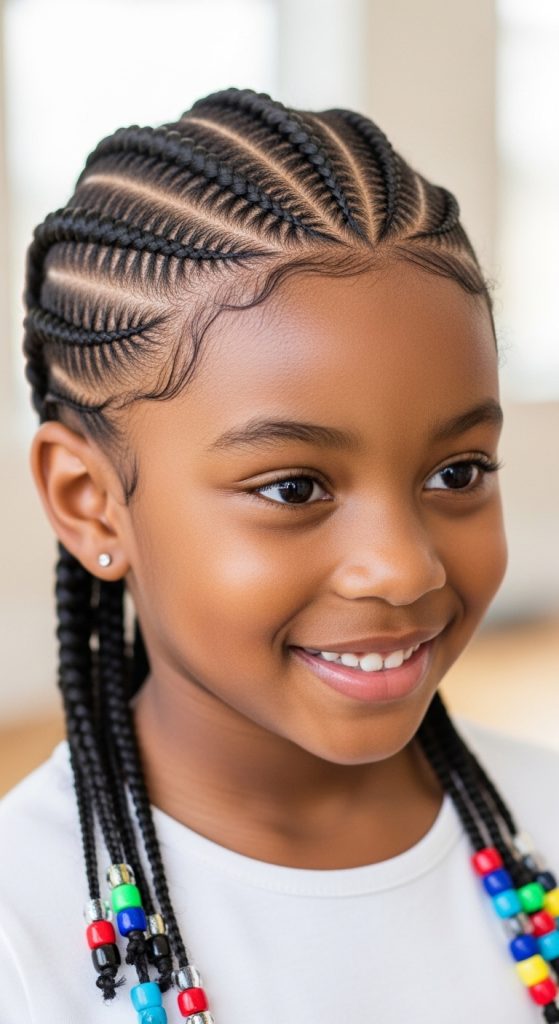
2. Four Cornrow Braids
Four straight-back cornrows give a slightly fuller look than two braids while still being easy to maintain.
Why Kids Love It
It looks neat and playful, and you can add beads for extra fun.
Step-by-Step
- Part hair into four even vertical sections.
- Apply light gel to each section.
- Cornrow each part straight back.
- Secure ends.
- Add colorful beads if desired.
Materials
- Comb
- Gel
- Beads (optional)
- Rubber bands
This style lasts about one week with proper care.
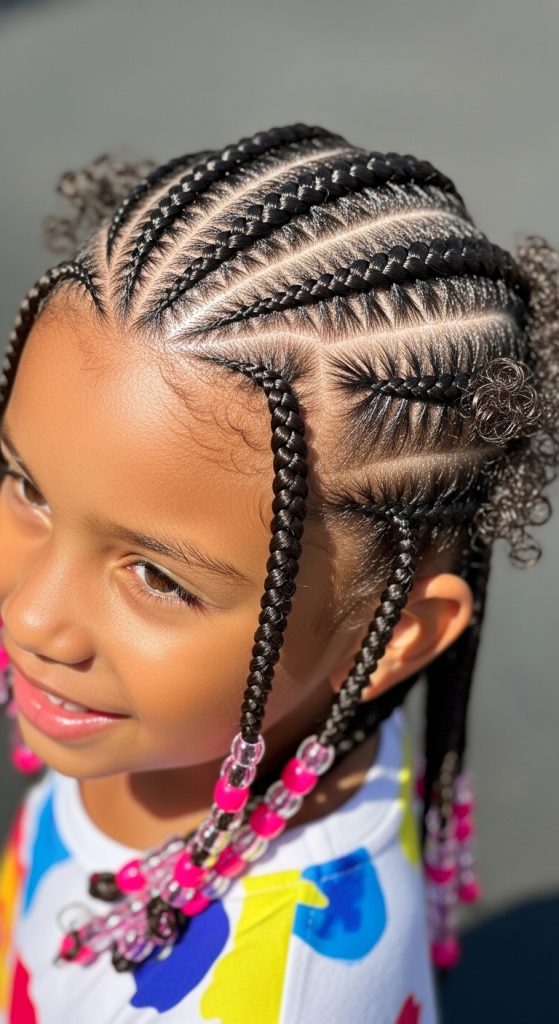
3. Side-Swept Cornrows
This braid style angles the braids toward one side of the head, creating a cute and modern look.
Why It’s Cute
The diagonal design frames the face beautifully and feels different from straight-back braids.
How to Create It
- Create a deep side part.
- Section hair diagonally.
- Cornrow each braid toward the same side.
- Secure ends neatly.
Materials
- Rat-tail comb
- Light gel
- Hair ties
Perfect for school photos or special events.
4. Braided Ponytail
A braided ponytail combines cornrows in the front with a puff or ponytail at the back.
Why It Works
It keeps hair out of the face while leaving volume in the back.
Steps
- Cornrow 3–5 braids toward the crown.
- Gather remaining hair into a ponytail.
- Secure with hair band.
- Add bow or beads.
Materials
- Comb
- Gel
- Hair band
- Optional accessories
Easy, quick, and adorable.
5. Crisscross Braids with Rubber Bands
This playful style uses rubber bands to create a crisscross pattern at the front before braiding.
Why It’s Fun
Kids love the colorful rubber bands, and it looks creative without being complicated.
How-To
- Section front into small squares.
- Secure each with rubber bands.
- Cross sections over each other.
- Cornrow remaining hair back.
Materials
- Small rubber bands
- Comb
- Gel
Great for birthdays or fun school days.
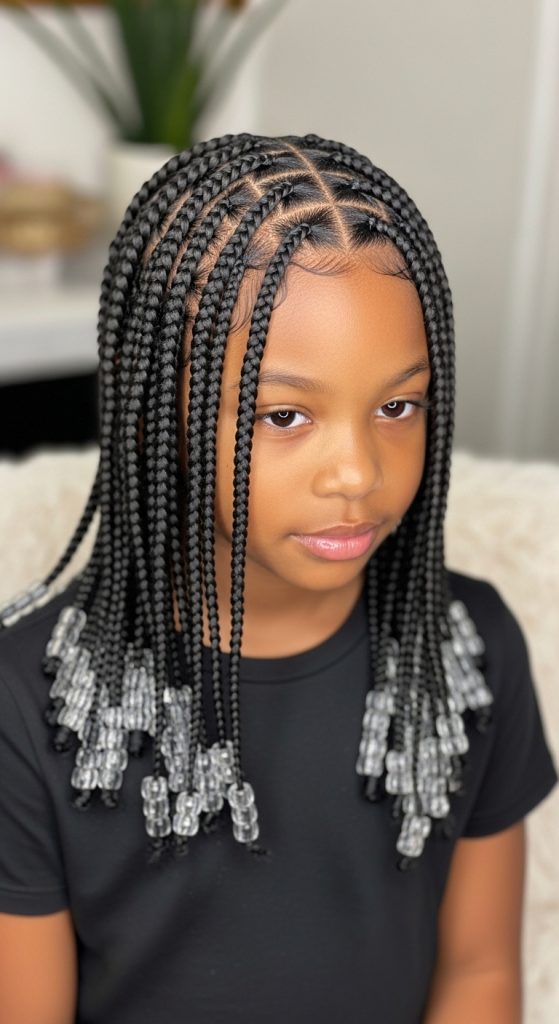
6. Box Braids for Kids (Medium Size)
Medium box braids are a protective option that can last 2–3 weeks.
Why Parents Choose It
It reduces daily styling and protects natural hair.
Steps
- Part hair into square sections.
- Add braiding hair if desired.
- Braid each section evenly.
- Secure ends with beads or elastics.
Materials
- Rat-tail comb
- Braiding hair (optional)
- Gel
- Beads
Keep tension gentle for comfort.
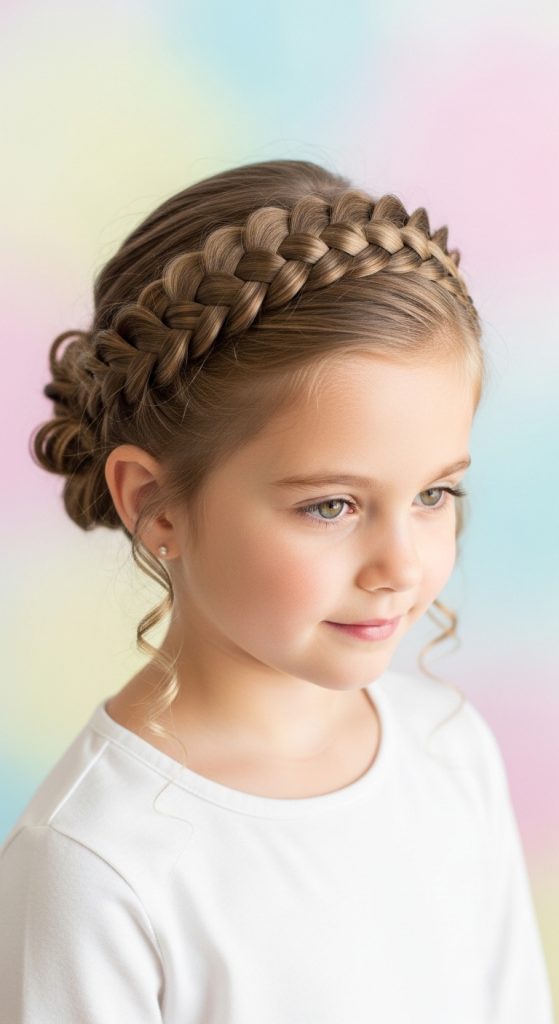
7. Crown Braid Style
A crown braid wraps around the head like a halo.
Why It’s Special
Perfect for weddings, parties, or special events.
How-To
- Start braiding near the front hairline.
- Follow hairline around head.
- Secure braid neatly at the back.
Materials
- Comb
- Gel
- Bobby pins
Elegant and secure.
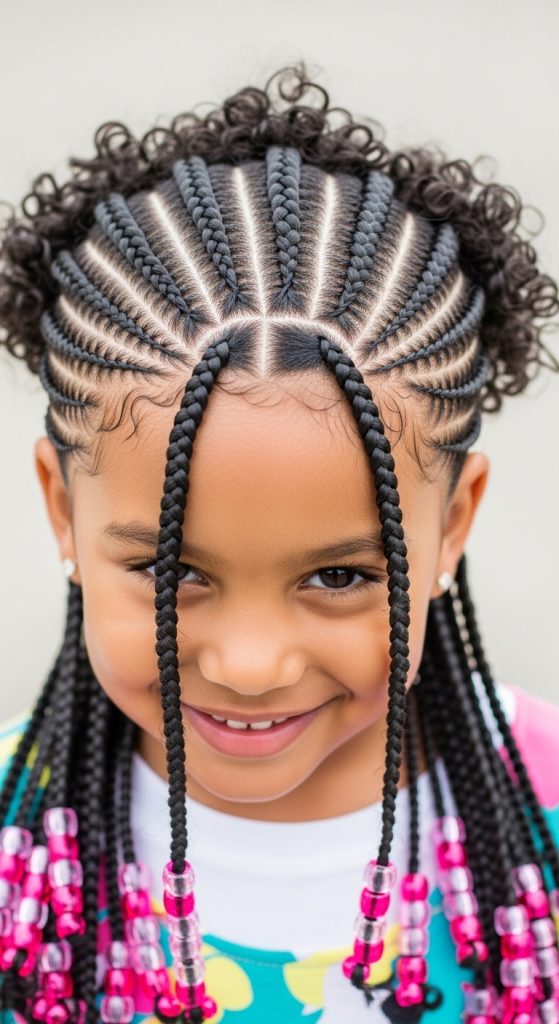
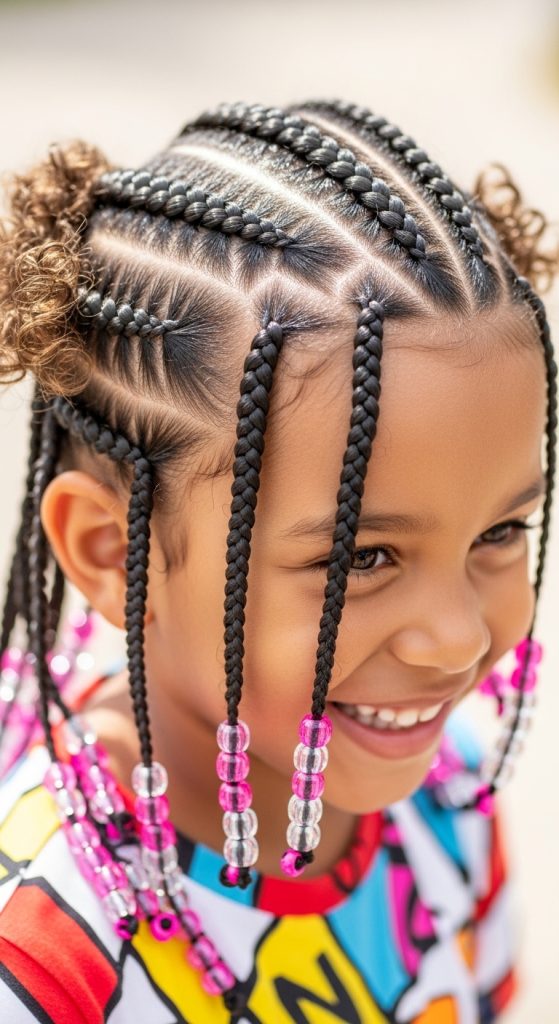
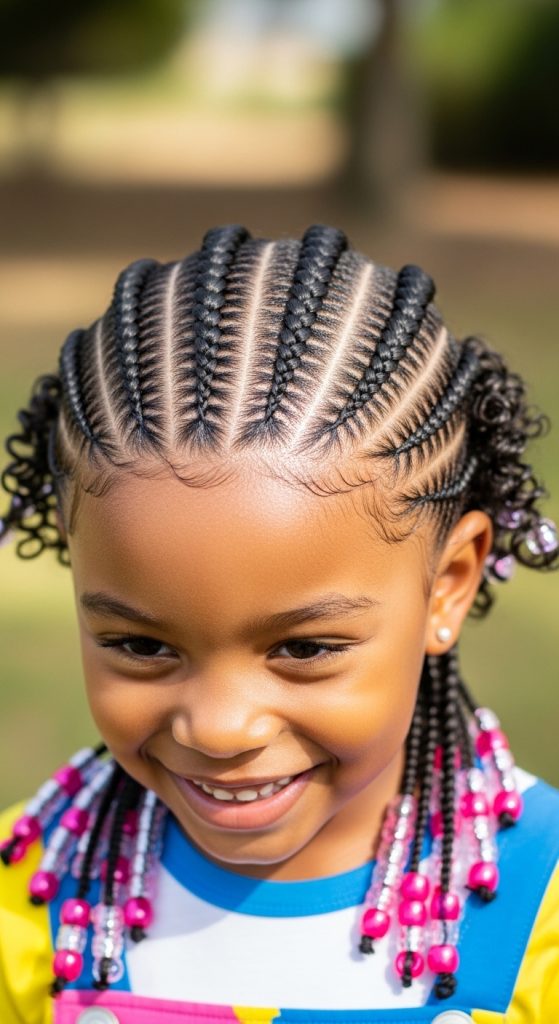
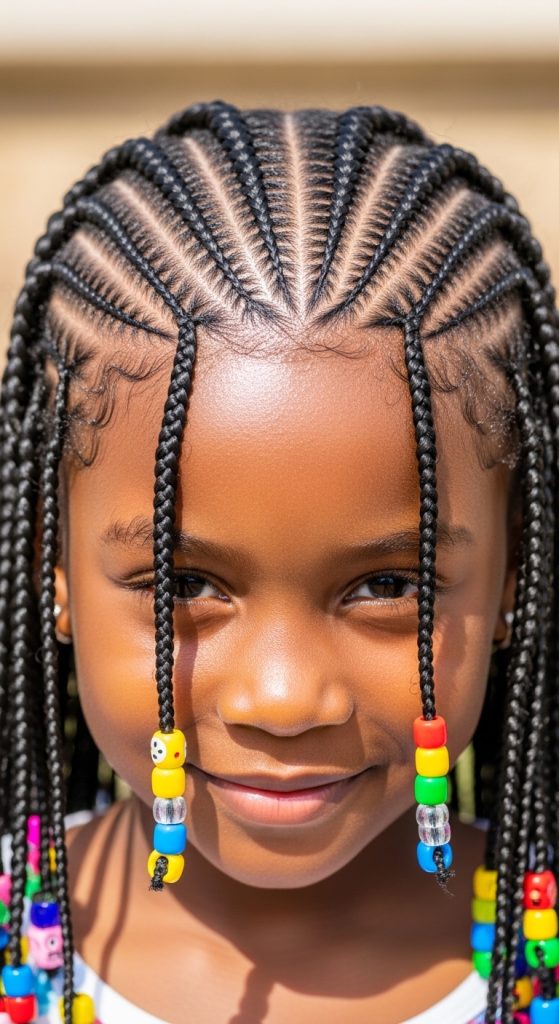
8. Beaded Fulani-Style Braids for Kids
This style features front-to-back cornrows with beads at the ends.
Why It’s Popular
The beads add movement and personality.
Steps
- Create center part.
- Cornrow sections toward the back.
- Leave a few braids hanging in front.
- Add beads at ends.
Materials
- Comb
- Gel
- Beads
- Bead threader
Cute and stylish for any age.
9. Two Braids into Low Buns
Instead of leaving braids down, twist them into small buns.
Why It’s Practical
Keeps hair secure during sports or playtime.
Steps
- Create two straight-back braids.
- Twist each braid into a bun.
- Secure with pins or elastics.
Materials
- Comb
- Gel
- Hair pins
Perfect for active kids.

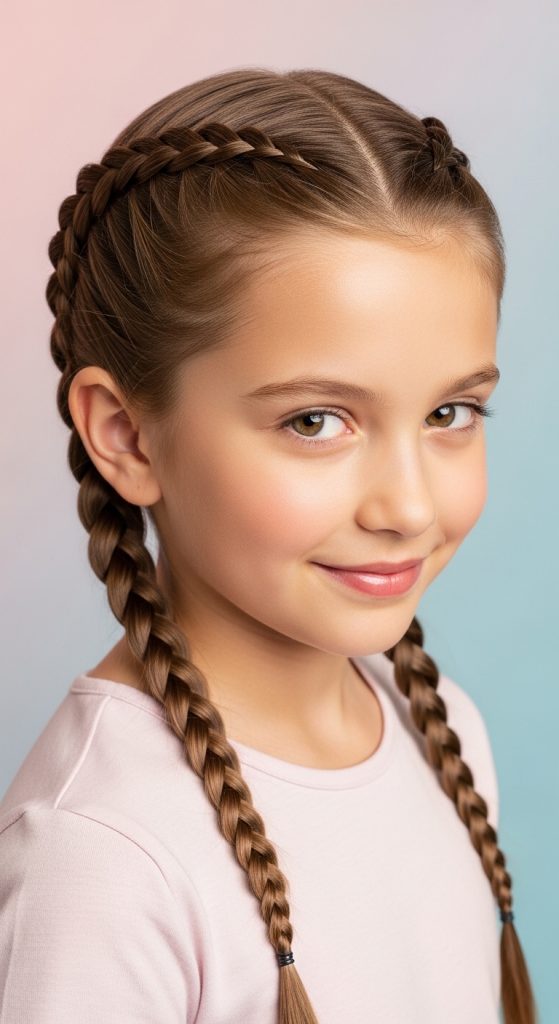
10. Simple French Braids
French braids are soft, classic, and beginner-friendly.
Why It’s Easy
No extensions required, and it works on medium to long hair.
How-To
- Divide hair into two sections.
- Begin French braiding from front.
- Add hair gradually as you braid down.
- Secure with elastic.
Materials
- Brush
- Hair elastics
- Light styling cream